Quick Quarantine Clean-Ups
- Alex Geisler
- Jan 29, 2021
- 5 min read
If you've been following along on Insta, you know that shortly after Christmas I was diagnosed with covid. Because of my autoimmune disorder, I got hit pretty hard and ended up getting pneumonia. I'll save that experience for another blog post! Because I tested positive, my husband and kids were quarantined for 24 DAYS. 576 hours. 34,560 minutes. In other words, a long frickin' time.
Because my husband was working from home and the kids were remote learning, while I was out of quarantine after ten days, I spent most of the time with them, as well. I felt like crap most of the time, but I did have some bursts of energy toward the end. Enter quick quarantine clean-ups.
These were mainly organizational projects that didn't take much effort or time. These are the areas of my house that get the most disheveled the fastest. I've tried numerous systems and I was sick of the clutter. We're in week three and the system seems to be working for us so I wanted to share!
Command Center
A quick Google or Pinterest search for "family command center" will yield you thousands of pictures of beautiful chalk board walls, color coded calendars and labeled paper trays. And those are fabulous. But they weren't realistic for our needs. I needed something that served multiple purposes:
Easy upkeep. While these all look great in the photos, many of them take a lot of upkeep to keep them looking that way. Our region is slowly coming out of covid restrictions, which means our lives are about to get busier and hectic again (part of me is screaming yay! the other part will miss this slow season of life). I know that it isn't realistic for me to update a weekly calendar or keep the paper clutter at a minimum (my kids bring home 1343544354 art pictures a day).
Simple: I didn't need much. We use electronic calendars so we don't necessarily need a printed one. I also try to file/purge papers every few weeks. Papers either get tossed (this is when a majority of the art projects go in the trash as the kids have now forgotten about them), filed, or put in the memory box (the good art projects usually make the cut).
Accessibility: My oldest is notorious for swiping my office supplies. Her latest favorite is sharpie markers and I have to breathe in and out of a paper bag when she does. I needed somewhere to put them out of her reach.
Hidden: This was my biggest need. Before, we had everything out on the counter and it caused me anxiety every time I looked at it. I wanted it out of sight, out of mind.

The end result (I always get too excited and forget to take before pictures!)
Components:
First shelf: papers. I stick any paper that I think I may need in here. Art projects, doctor's notes, etc. These are the papers that I referenced before that I usually file/sort every few weeks (once the paper tray gets full). Here's the link to my tray. Make sure you measure before you buy! I measured my cabinet beforehand and it still was a tight fit!
Second shelf: office supplies. This is where I put the scissors, pens, permanent markers, as well as anything we access on a regular basis (bug spray, sunscreen, etc.)
Top shelf: first aid. Our medicine cabinet is right next to this one and our first aid didn't quite fit. So I shifted it over.
Door: I used a command hook and cute clipboard from Amazon. This is my "now" section. These are permission slips to be returned, tax documents we're collecting to send to our accountant, checks to be cashed, and currently, a lottery ticket I got for a Christmas gift that I won 5 bucks on! Having them on the door not only keeps them accessible, but also reminds me of the things I need to do every time I open the cabinet (which is a lot).
Counter: As you can see beforehand, the paper tray was on our counter, which is the main thing I wanted to hide. Now, our counter only has a few decor pieces, as well as this new charging station. Another thing that I hated was the million cords on our counter. This charger cleaned that up significantly and was a worthy investment (and the gateway purchase that led to all of this organization).
Make sure you take an inventory of what type of cords you need and what comes with the charger (there are different options). Mine came with all Apple, so I ordered a set of the micro-USB for the kids' tablets and all the other random things we have to charge.
Medicine cabinet:
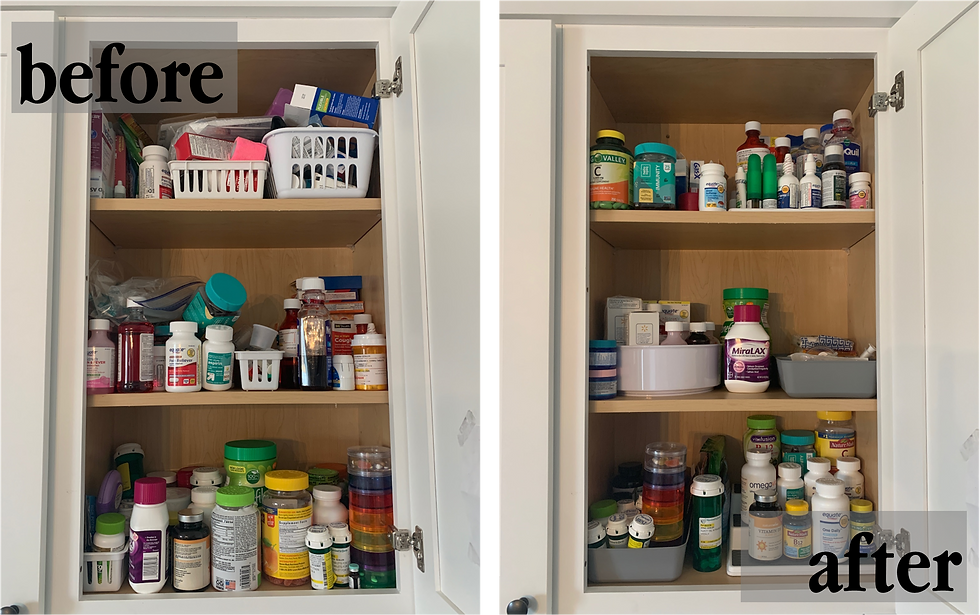
You don't realize how much medicine your family has until it is staring you in the face. Part of it is my autoimmune disorder and the other part is someone in the family gets sick and I go out and panic buy all kinds of medicine before checking our stock at home. This results in lots of double things and a full medicine cabinet. At least we're set if there's ever a zombie apocalypse!
These two organization gadgets helped me with this organization. I was able to fit all of the kids' medicine in the lazy Susan. The thing I like most about this particular item is the high sides. I have had lazy Susans before that are flat and while I like them, I prefer the ones with the sides. Things don't fly off when you're spinning and you can cram more in there since it's contained. The stair step shelf is functional, especially for medicine so you can see what you're looking at (and hopefully avoid buying 7 boxes of Tylenol cold and sinus) I also used some cute baskets from Target!
Side note: I am loving all of mDesign's organization tools on Amazon and want to buy all the things. Check out the brand!
Your medicine should be placed on shelves according to it's use. Keep your daily medicine on your first shelf so it is highly accessible. Next should be your mid-use meds (kids stuff for us). Top shelf are medicines we don't use as often, as well as the extras/backups we have of our vitamins.
I also redid our cleaning supplies cabinet and two "junk" drawers! One junk drawers is for more office and technology items (since my husband has completely taken over the home office I designed and decorated for myself) and the other is the more random, standard junk drawer items. Invest in some cheap baskets from Walmart or Target and this is an easy project! The hard part is KEEPING it organized.

Jeans
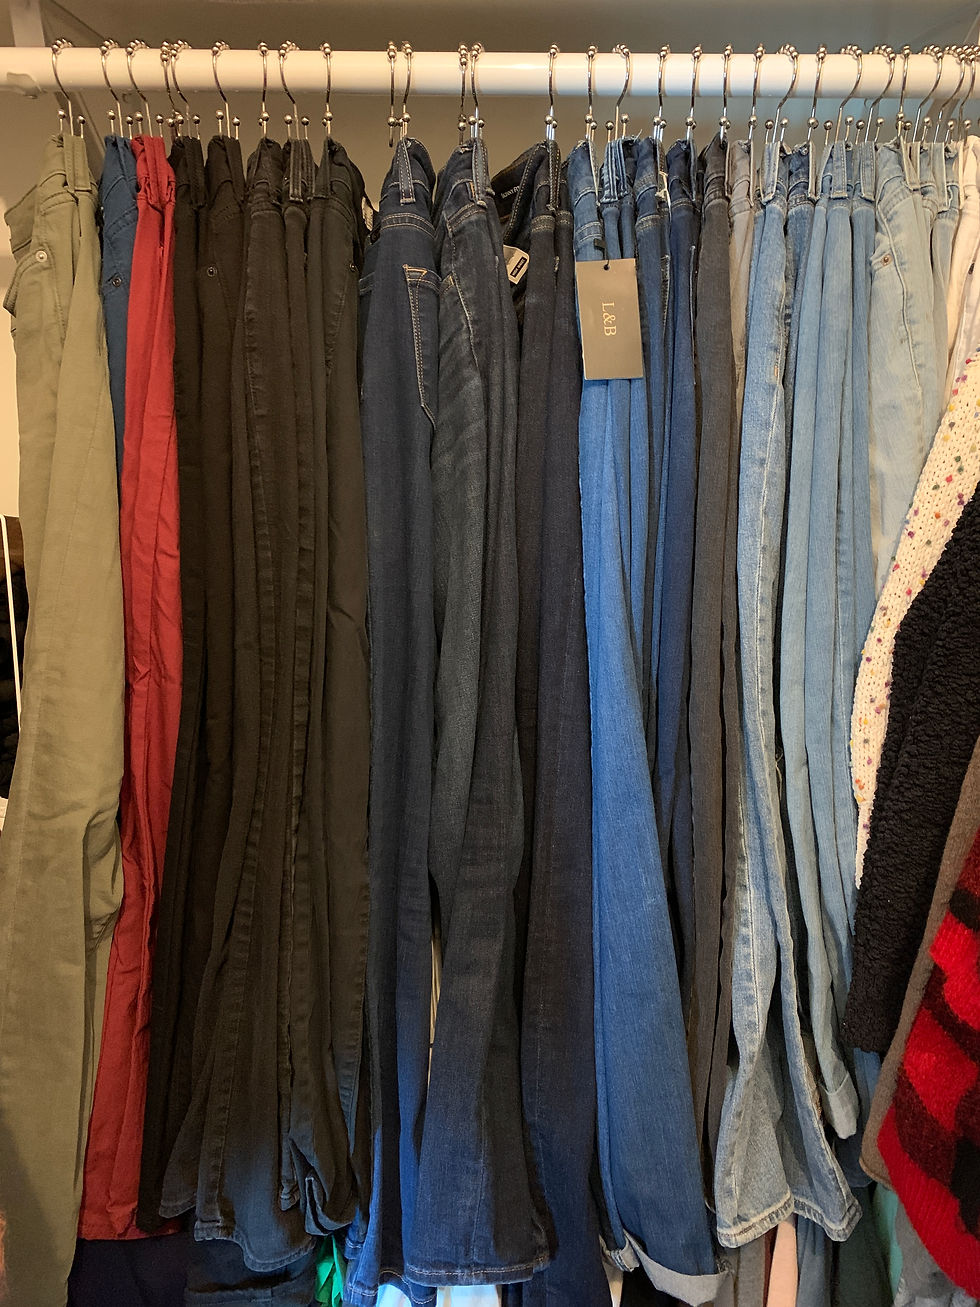
I've been influenced. So many of the bloggers I follow on Instagram have recommended storing your jeans this way and I finally gave in. I must say, I'm a big fan. They are more accessible, neater and I find myself wearing different pairs since they are all displayed instead of shoved into a pile. These are just shower curtain hooks. You loop your two side
belt loops on the hooks where the shower curtain would go. I highly recommend!
Lids

This project was short and sweet, but made a world of difference. I highly recommend this Tupperware lid organizer so you're not cursing under your breath after dinner each night while packing up the leftovers!
This weekend I am tackling our craft closet and our Barbie chaos. Stay tuned and wish me luck!
*As an Amazon Associate I earn from qualifying purchases. I get commissions for purchases made through links in this post.


Comments